
After many days (possibly years! Likely months…) of working on a quilt where you’ve painstakingly pieced the top, basted all the layers, and then quilted and sewed on the binding, it’s incredibly frustrating to find your quilt does not lie flat. Or, even worse, it has waves in it! We don’t like wrinkles anywhere. May all our quilts age as gracefully as our faces, right? Flat quilts are #goals so we’ve pulled together our favorite tips and techniques to achieve a flat quilt.
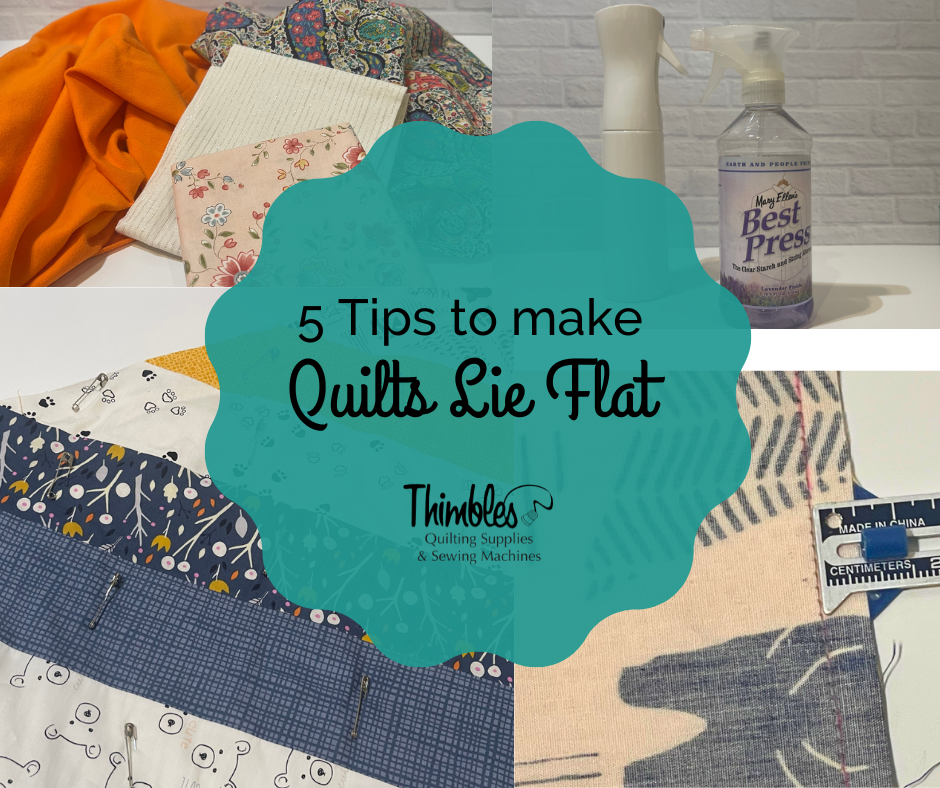
1. Fabric Selection

Some fabrics are more prone to distortion. These are usually lighter weight fabrics such as voile, lawn, or crossweaves, or stretchy fabrics like jersey knits. Stabilizing your fabric with starch by using Magic Premium Quilting and Crafting Spray, or including lightweight interfacing like Shape-Flex Interfacing can can make a big difference in achieving a flat quilt.

2. Square the Quilt

Before adding the binding or finishing the edges, ensure that your quilt is squared. Use acrylic quilting rulers (Creative Grids 6.5 x 24.5 is a great size for this) or a carpenter's square to measure and trim the edges so they are straight and at right angles to each other. This will help prevent any distortion that might cause waviness. Learn more about quilting rulers in our Quick Guide to Quilting Rulers.
3. Accurate Piecing

When piecing, make sure your seam allowances are consistent and accurate throughout the quilt. Inconsistent seam allowances can lead to distortion and cause the quilt to wave or pucker. There are several tools available for accurate and even piecing, such as the Sew Standard Seam Guide.

Additionally, when piecing, do not pull or stretch your pieces when sewing, especially when they are off in size. If possible, always re-cut fabric for piecing so the final block will not be distorted.
4. Proper Pressing

Press your seams using a hot iron (our favorite is the Rowenta Perfect Steam Pro Iron) so that your blocks lay flat. For flatter seams, you can set the seam first by pressing it closed without opening it up. Then, press the seam to the side or open it, based on pattern instructions. You can also use a clapper to set your seams again. Try not to stretch the fabric as you press, whether with the seam or pulling on the bias. Learn more about pressing in The Beginner's Guide to Quilting: Tips to Make Your First Project a Breeze!
5. Basting

When layering your quilt make sure all layers are smooth and free from wrinkles. Check for ripples as you baste and smooth them out before using basting spray or safety pins to hold the layers together securely. This will help prevent the fabric from shifting and creating waves during quilting.
Bonus Tips!
Block the Quilt
After quilting, gently block the quilt to encourage it to lie flat. You can do this by carefully misting the quilt top with water and using a flat surface (like a large table, foam board, or insulation board) that is larger or the same size as your quilt to square it up. Use pins to secure the edges and let it dry completely. Then trim and proceed with binding. The above is a fantastic video from Darty Kite Pattern Co. on how to properly block your quilt.
Do you have go-to tips for making your quilts lie flat? Let us know!
Like this post? Pin it to reference later!